Traditional Grip for Beginners [Surprising Things You Should Know]
This traditional grip for beginners blog will get you off to a good start when learning traditional grip drumming. Traditional grip drumming is perhaps not so common these days with drum set players but it’s definitely a fun way to play and can get addictive…
Once Upon A Time…
Once upon a time, military drummers played their field drums hanging from a sling slung across their shoulder. As a result their drums tilted away from their bodies at an angle (a downward angle towards the floor). While marching, the drums either hung down in front of them or, more conveniently, positioned by their sides – this made it easier for them to march and play simultaneously (hence the term ‘side drum’). Playing these drums with a conventional grip would have proved uncomfortable for the one hand. So to accommodate for the angle of the drum, traditional grip (as we know it today) is a way of holding the drumstick underneath. It SOLVED the problem of playing on an angled drum. So let’s see how you go about holding the stick in Traditional Grip…
Holding the Stick
Step 1 – You hold the stick in your left hand (if your right handed) by sandwiching it into the webbing – between the thumb and the palm of your hand. Place the stick around 3/4 in from the tip of the stick. This is otherwise known as the fulcrum (balance point).
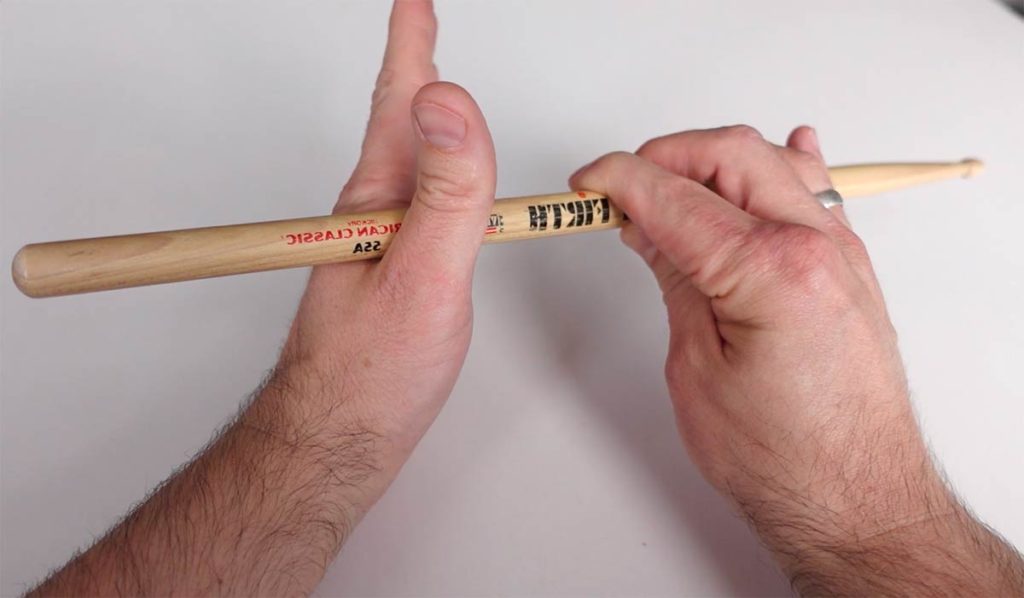
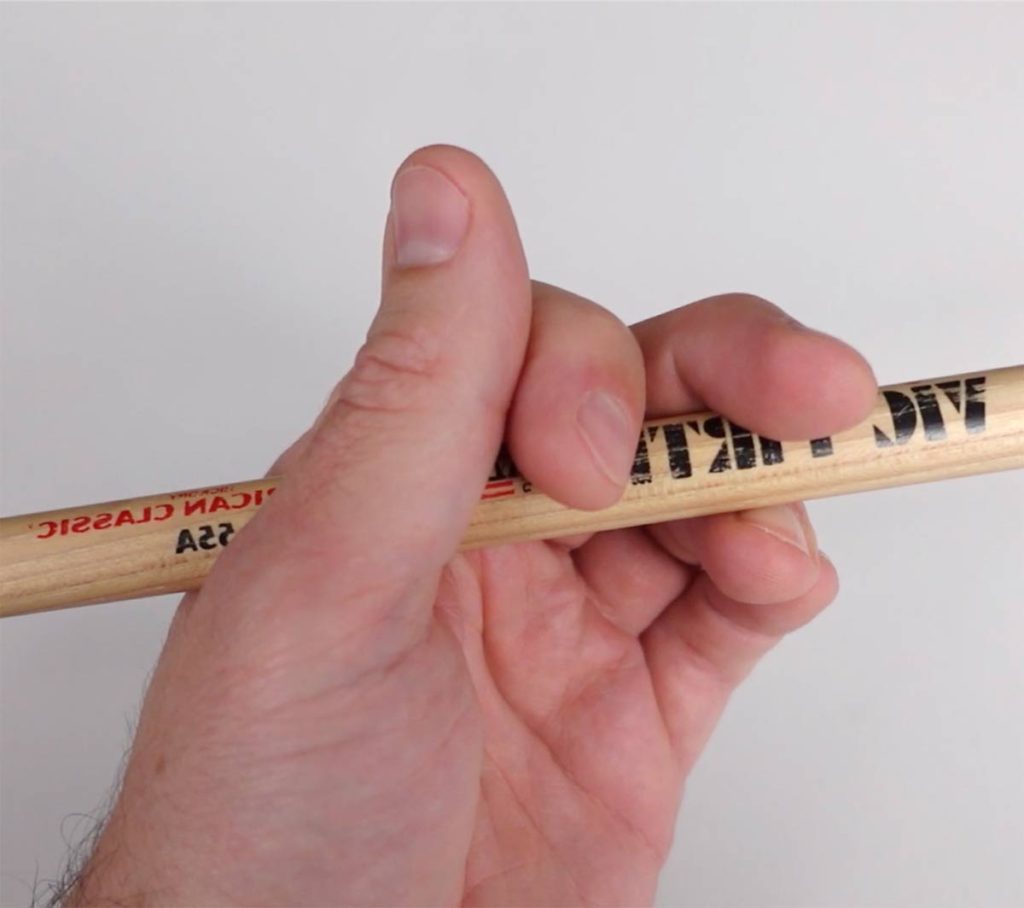
Step 2 – The stick then rests on the ring finger’s nail. Your pinky finger remains underneath the ring finger acting as a support. The stick needs to be at a 45° angle (or 135° away from the forearm – depending on which angle you choose) NOT 90° angle from your forearm. This is so your thumb and first finger can operate the stick easily from above the stick without being in a fully depressed position. Which means, your fingers remain relatively open so that there is room to maneuver as opposed to clamped against the hand with limited movement.
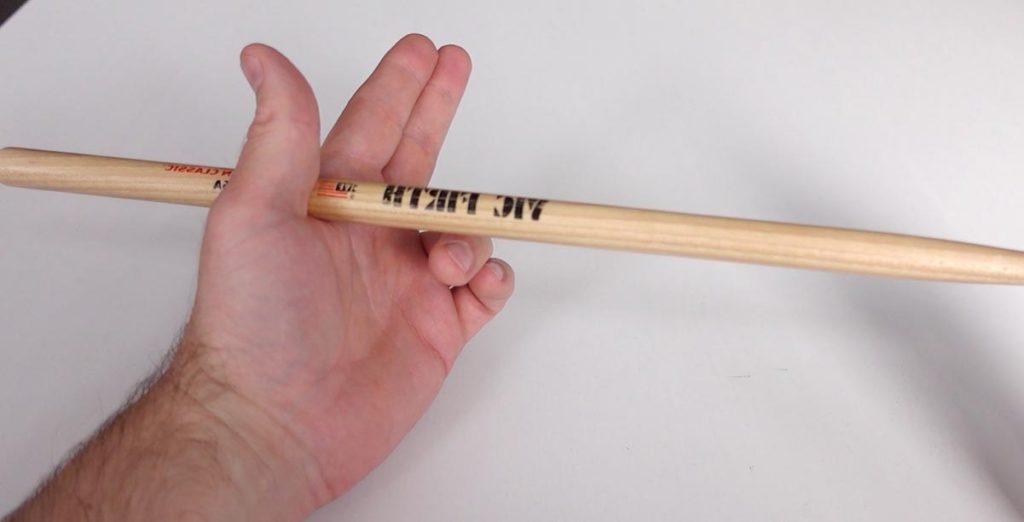
Step 3 – The first finger and middle finger curl over the top of the stick.
Step 4 – Your thumb attaches itself onto the first finger; usually on the medial phalanges bone (in between the two joints). This does depend on the thickness of the stick obviously.
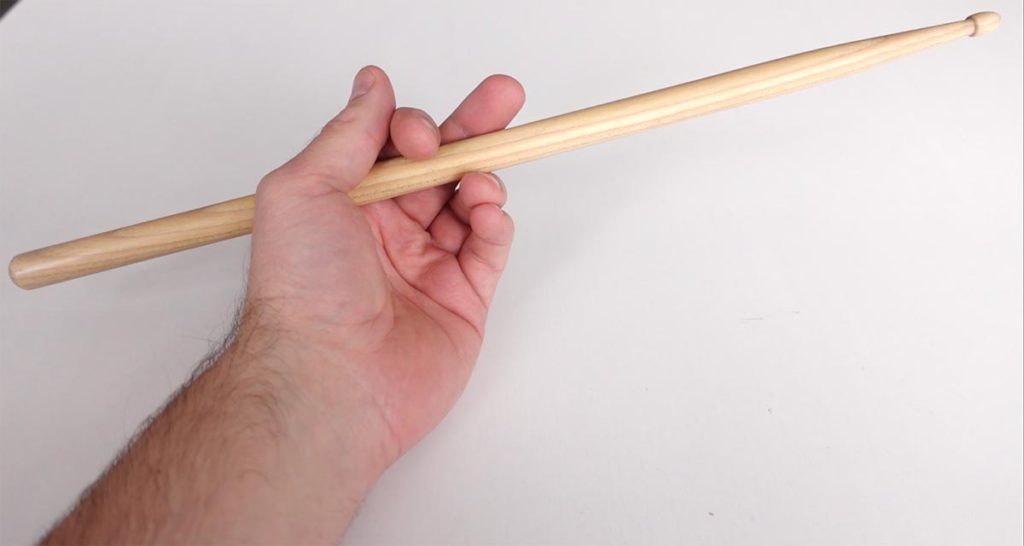
Point the tip of the stick towards the middle of your drum or drum pad and you’re ready for the next step.
The Motion of The Wrist
Actually, before you hold the drumstick in the ways mentioned above, firstly stick out your left hand as if you are going to shake someone’s hand. If you rotate you hand from side to side from the wrist, you’ll have the fundamental motion of the wrist for traditional grip.
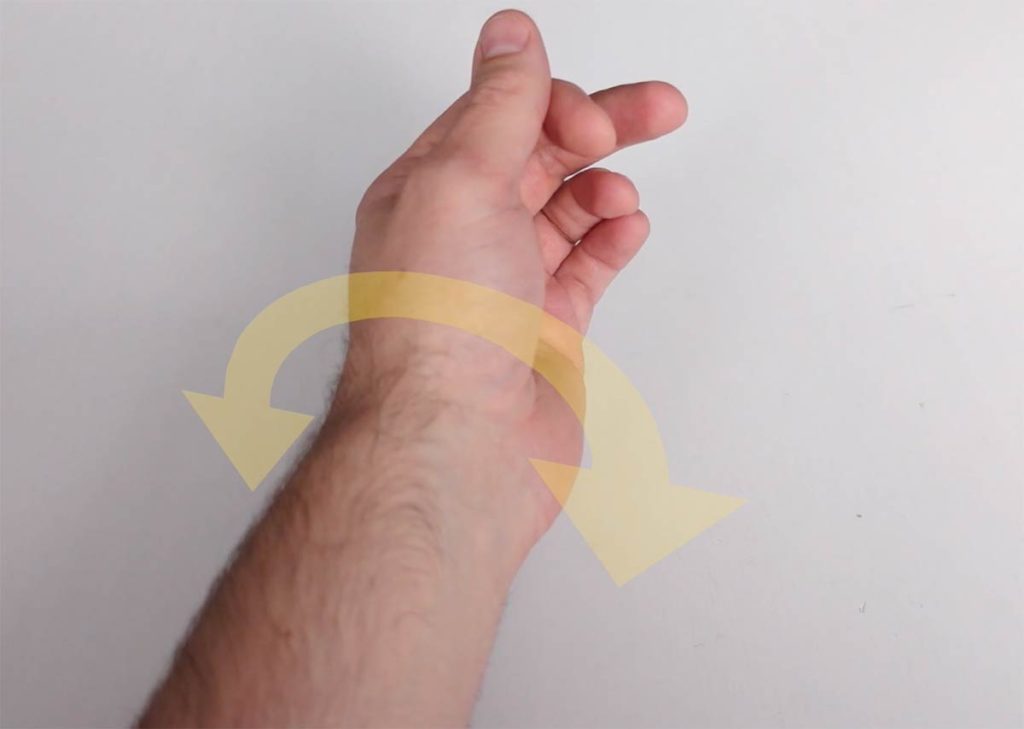
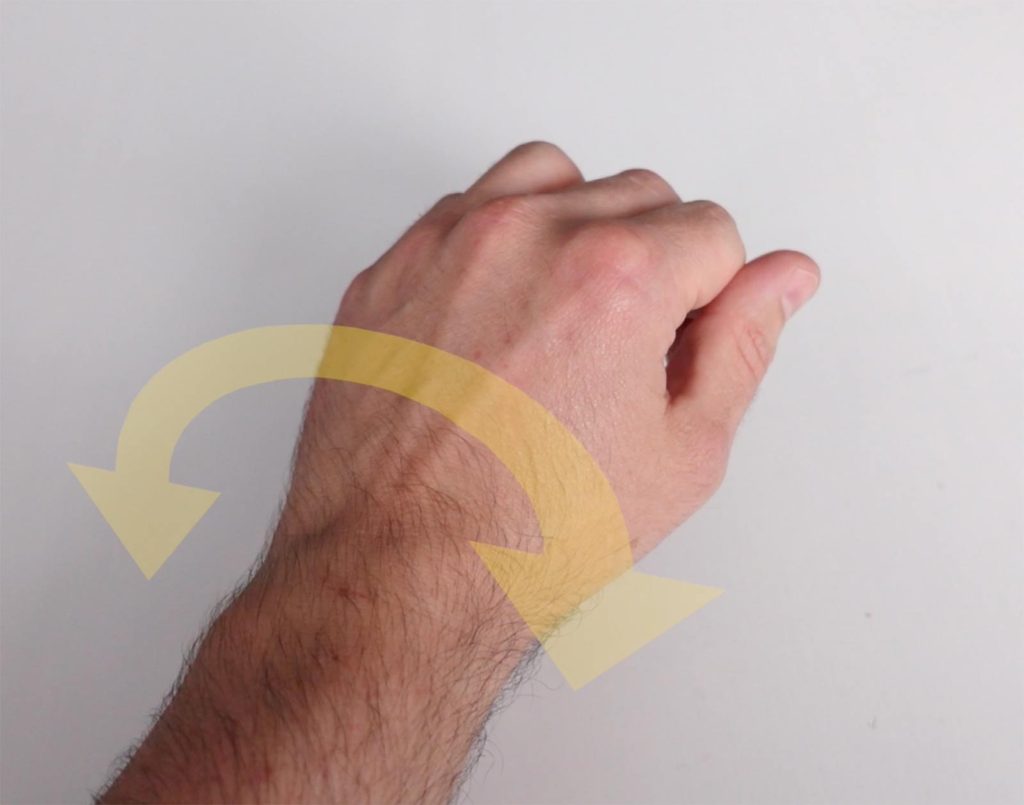
Some say, it’s the same motion as turning a door knob. It’s also the same motion as turning a key in a lock or the ignition of a car.
Once you follow the steps above, you’re ready for the next step.
Playing The Drum / Starting With Free Strokes
When playing the drum you should start with playing free strokes. There are other strokes such as; the down stroke, the up stroke and the tap stroke but for all intents and purposes we’ll get the ball rolling with free strokes.
To do this, start by pointing the tip of your stick upwards towards the sky – the palm of your hand will face the upwards. Next, allow your wrist to turn inward to strike the drum. To do this properly, release your ring finger from the stick on the way down towards the drum. Once the stick has struck the surface, allow it to rebound up to the initial starting point. That’s the aim of the FREE stroke, you want the stick to rebound on its own or to push your hand back to its original starting position WITHOUT any assistance from you. Then, reattach your ring finger to hold it in place.
You’ll want to have a similar sensation such as bouncing a ball on the floor. Once you’ve set the stick in motion allow it to bounce back. This is a free or full stroke in drumming terminology. Now, see if you can do this repeatedly. The trick is to throw the stick towards the drum FAST not hard. You’ll notice the stick will return upwards at the same speed you throw it down. Only when you want to STOP the stick, reattach the ring finger. Otherwise, let the stick freely bounce away in succession.
Practicing free strokes will get you off to a good start with your traditional grip as it’s also a great exercise for the wrist and fingers.
Traditional Grip Finger Control
The next exercise with traditional grip is finger control. Primarily this is done by the the thumb and first finger. Mainly because of their distance from the fulcrum / balance point – as they [the finger and thumb] are closer, there’s less distance to cover when manipulating the stick up and down. You can use the middle finger but it’s role is generally to keep the stick in place and to assist stopping the stick with the ring finger.
Much like bouncing the stick with the wrist, you want the same concept with the fingers. Start by bouncing the stick with only your thumb pad / thumbprint on top of the stick. This may be tricky at first but keep trying. Once you can bounce the stick with the pad of your thumb, do it repeatedly without stopping. The more perfect reps the better.
Next, you move onto your first finger. Imagine the pulling-a-trigger motion by bending the middle knuckle. This motion is what’s needed with traditional grip first finger control – see the video above. Using the ‘pulling the trigger’ motion on top of the stick will force the stick downwards towards the drum. Subsequently, when you return your finger forward you allow the stick to rebound upwards on it’s own (using the bounce). Again, this can be tricky at first but do persist until you get it. Make sure you hold the stick enough in the webbing of your hand to keep the stick stable.
Different Feel When Playing
You may experience a different ‘feel’ when playing traditional grip. It feels different because it’s an asymmetrical grip. There’s less flesh attached to the stick for a start. Also, the palm of the hand is underneath the stick as opposed above it – like in matched grip. As a result, the drum stick will have more of a woody, resonant sound (noticeable on a practice pad, less so on a drum). This is simply because there is less of YOU on the stick.
In fact that’s an argument FOR traditional grip. The idea that you have a left hand and right hand working differently. The late, great Tony Williams gave his philosophy on this in his 1985 Zildjian day in Dallas. The fact that we have a left hand and a right hand that have to coordinate with one another – so that you get a sense of a right and a left hand instead of 2x right hands or 2x left hands [such as with matched grip]. It’s also similar to how a stringed instrument player plays their instrument; there’s one hand for bowing / picking / strumming and the other used to fret the notes.
Problems That May Occur With Traditional Grip
The problems that may occur (at first) are –
- It can hurt or be uncomfortable
- Loosening of the stick from the fulcrum
- The stick wanting to go back to a 90° angel from the hand
- Strange sensation rotating the wrist
- Wrist kinked / contorted
- Angry you can’t make it work, when someone else is making it look so easy.
These are all true and unfortunately Traditional Grip for beginners can be tricky to grasp (pardon the pun). Any discomfort or pain can be attributed to unfamiliarity or more commonly – bad technique. Effectively that means your body is telling you that you’re doing something wrong. If you find this is persistently the case, best get some advice on exercises to help you avoid any discomfort and correct any bad technique.
Incidentally, some drummers take years to master traditional grip, others take months – even weeks. Traditional grip is a grip that requires perseverance, correct practice and lots and lots of repetitions. You’ll get the hang of it if you stick with it!
Incidentally, you can download my FREE training “5 DEADLY MISTAKES BEGINNER DRUMMERS MAKE”.
Why Do Students Give Up On Traditional Grip?
Because is there any real need for it these days? It’s definitely easier and more natural to play matched grip. Especially on a drum set with flat / horizontal angled drums.
For example, music that requires a big, consistent back beat lends itself more to matched grip. Not to mention, matched grip naturally has a larger range of motion. Therefore the ease, consistency and balance of sound is more apparent. That’s not to say you can’t achieve these things by playing traditional grip. You can. It’s just not as straight forward as matched.
Another argument is the style of music. Many associate traditional grip drumming with jazz music. Mainly because the original jazz drummers played traditional grip. They either came from a military background or were taught by military drummers. Look at early photo’s of the jazz drummers and notice the angle of their snare drums. Jazz music doesn’t have a consistent back beat played on the snare drum throughout compositions. The left hand will usually accompany the melody (or ‘comp’) on the snare drum. Dynamics, especially with a lighter touch are more of what’s required. Therefore because of the positioning and angle of traditional grip towards the drum, some drummers find it easier to play that way.
As jazz isn’t as popular in contemporary music as it once was, it begs the next question….
Why Still Use Traditional Grip Today?
So why still use Traditional Grip today? Well, why not? Its a tradition and there’s nothing wrong with using traditional grip; it’s fun to do. It obviously CAN be used drum set playing and in any style of music; in fact, many of the drumming greats played traditional grip. I would argue aesthetic pleasure and nostalgia play a huge part in it’s use. Not forgetting because of it’s asymmetry, you feel and think a different way when you play traditional grip. Not forgetting it remains a popular choice of grip with the snare drummers in drum lines / marching bands.
The main thing to remember is that it’s just A way of playing the drum. Like the saying goes ‘There’s more than one way to skin a cat’. I believe this aptly describes the choice of grip you use when drumming. After all, if you can play well with traditional grip, who cares which way you hold the stick?
I would also say that if you’re thinking of taking up Traditional Grip, do think about how you angle your drums. Even though you can play Traditional Grip on a flat angled drum (even a drum tilted towards you), know that the grip wasn’t designed for that. Which inevitably will mean your body will contort or lean over more to your Traditional Grip side to compensate for the flatter angle. Furthermore, you will have to raise the drum height slightly (to compensate for the left hand not hitting your leg). However, if you angle the drum away from you towards the same direction as the angle of the stick in traditional grip, then you’ll have less problems. Which, will give you the most advantage, range of motion and perhaps less of a bad back in the future….Food for thought anyway.
Drumming For Beginners Freebie!!!
Thank you for reading my blog, if you haven’t already do check out my traditional grip for beginners YouTube video and do sign up for your FREEBIE below!
Download my FREE TRAINING
“5 DEADLY MISTAKES BEGINNER DRUMMERS MAKE”